Pages

Friday, August 23, 2013

Tearing Down Walls

Let's talk about structure. How do you know if a wall is load bearing? All exterior walls are load bearing, but what about interior walls? First, take a look at your roof. Which way is your roof line running?  Then take a trip to the attic. This is my attic.
 
 The roof trusses, or joists, are what make up the structure of your roof. Your roof ridge line is the highest point of your roof. Most of the time, load bearing walls run parallel to the roof ridge line and perpendicular to your joists.
 
 
 So, in my case, my load bearing wall runs between the living and dining rooms and the kitchen and office.
 
My non-load bearing walls are between the dining room and office and between the living room and kitchen. Mr. Skeptic stood scratching his chin and staring at this non-load bearing wall one night. He said, "That looks like a load bearing wall to me." I said, "Really? Why?" And his reply was something like it looked really sturdy and well-built. Well, of course it is, but it's not load bearing. You can see a big difference between the beams used above the doorways in these two different walls.
 

Non-Load Bearing


Load Bearing

So, although we have been busy tearing drywall off just about every interior wall in the house, we haven't taken down any of the framing yet. Before taking the drywall down, be sure to turn the power off to that area at the breaker box and always wear proper safety gear.


I have the best demolition crew! One of our non-load bearing walls is in an area where the exterior walls come together at a 90 degree angle.
 
 
And the other has several electrical lines running through it...light switches, a 220 line for the stove, and the water line for the refrigerator.


So, we have hired a professional to be sure the structural integrity of the house remains intact. If you are ever in doubt, ask for help. You can start with your local building authority. They will often be able to answer questions for you or steer you in the right direction. Check with them about any permits that you may need as well. You may need the help of an architect or a structural engineer depending on the scope of your plans. My walls will be coming down this week and I can't wait! Big changes are coming.
 
Nicole
 

Saturday, August 17, 2013

Let's Talk Numbers

With any big project, you need to have a budget. So, Mr. Skeptic and I sat down a while back to discuss what that budget should be. Before I tell you the magic number, let me again share my scope of work.  I am filling in the spindle wall, knocking out two non-load bearing walls, breaking through a load bearing wall in two places, one of which needs a 13 foot LVL (laminated veneer lumber, it's a type of support beam), reconfiguring the kitchen to expand into another room which requires running a 220 line for the stove, a dedicated outlet for the refrigerator, and the water line for the refrigerator, painting the cabinets, new countertops, farmhouse sink and faucet, light fixtures, backsplash tile, and new hardwoods for 980 square feet! Whew! Is your head spinning yet? I'm sure I forgot something...
 
So, how much should this cost? Hmmm? Take a guess...come on! What do you think? $20,000? 30,000? Drumroll please.....$6,000!!!! No, that's not a typo. Mr. Skeptic and I agreed on $6,000. Some of you may recall my cabinet painting estimate. This guy wanted to charge me $5,000 to paint my cabinets! HA! Laughable, right? (Not as laughable as my budget!) I'm always up for a challenge. I was able to negotiate a few things. (In my previous life, I negotiated multi-million dollar contracts, and they were easier!) Furnishings will not be taken from this budget. YES! I am definitely arguing that the awesome farmhouse island is a freestanding piece of furniture and should therefore not be included in my budget!
 
How am I doing so far, you ask? Well, I could have blown my whole budget and then some just on flooring. But I found a Shaw Liquidator based out of Murphy, NC. Shaw makes their floors in Dalton, GA, and their trucks have to travel through Chattanooga to get to Murphy! Good news for me! They had exactly what I wanted, 3/4 inch oak, dark stained, hand-scraped, 5 inch wide planks...gorgeous! Shaw's specifications were that the bevel should be 30/1000 of an inch. This batch measured 42/1000 of an inch....noticeable to the naked eye? NOOOOO! So, I got 1100 square feet, delivered inside my house, for $2,900. Now, that's half my budget, but it's also a great deal!
 
I also ordered my backslash tile. This is my splurge item. I loved it from the moment I saw it and knew it would have to make the cut. I only needed about 20 square feet, so at $430, it's worth it to me. Susan Jablon has some amazing tile and mine looks even better in person!

 
There are two things I don't play with, electrical and structural issues. I know enough about both to be dangerous. Nobody wants their house to burn down or fall down, right? Know your limitations and hire professionals when needed. My electrician is well worth the money, coming in at a mere $450. He will be finishing up on Monday. My carpenter/structural guy will hopefully get started this week. He is very reasonable, but I still have to decide how much I will be hiring him to do.
 
I really had my heart set on a quartz countertop that looked like Carrera marble, but have you seen my budget? At $60 a square foot, that won't be happening! I will be driving to my nearest Ikea to pick up a new farmhouse sink ($313) and butcher block countertops ($258).
 

I spent $62 to fill in the spindle wall, and $90 on my favorite paint, Annie Sloan Chalk Paint and Lacquer to paint my kitchen cabinets (so I saved $4,910!) So what is my total so far? Let's see...$4,503 not including my carpenter/structural costs. And I still need to buy a faucet, light fixtures, and wall paint! Do you think I can do it??? It's gonna be close! I sent Mr. Skeptic to the dump today because it was going to cost over $200 for a dumpster, and frankly, I couldn't afford it!
 
 
HA! I didn't even make him wear that shirt! The dump was free, and free is good!

 
I need a truck, but it's not in the budget!


So, here's how we are looking these days! Quite the mess, huh? The end result will be worth it! This week is sure to bring major changes! Okay, back to work for me.
 
Nicole


Wednesday, August 14, 2013

A Wall for a Wall

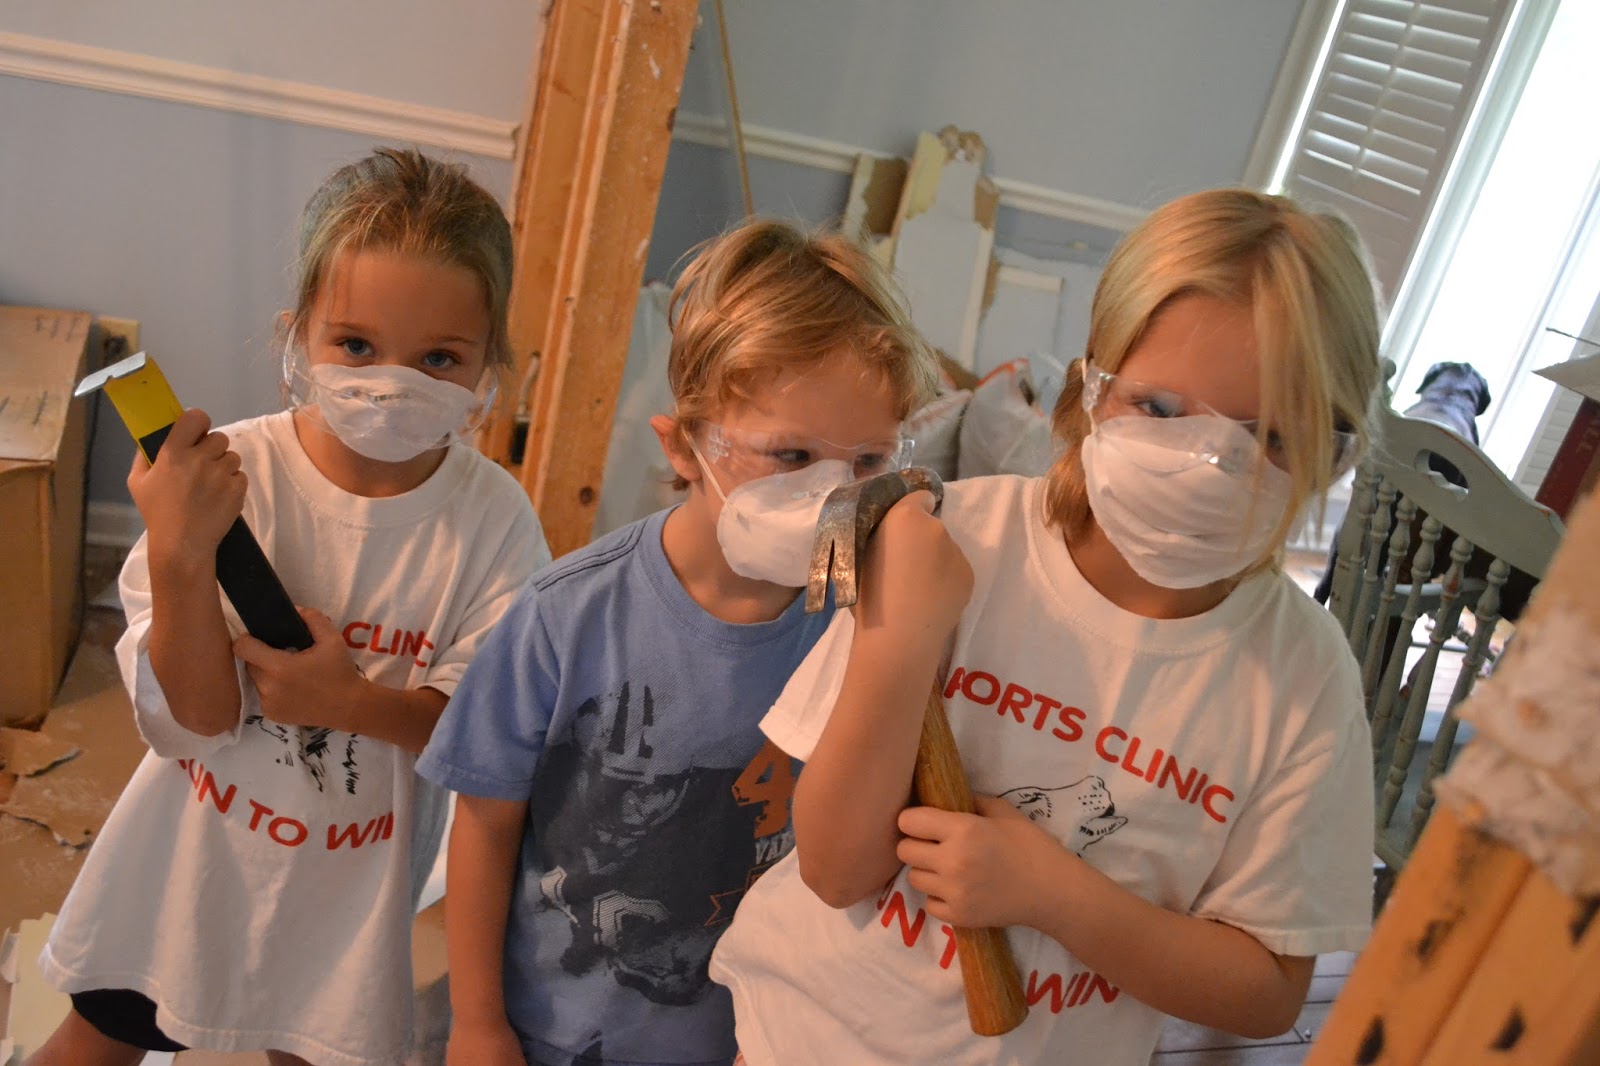
It's been a busy week as we kicked off the renovations! Our first project was to fill in the crazy spindle wall so we could move the monster entertainment center over there.


So, the hammer came out and we beat all those spindles to a pulp! I started at the bottom and they weren't budging, so I tried hitting them from the top and they came out very easily. The bottom pieces had pegs to secure them.
 
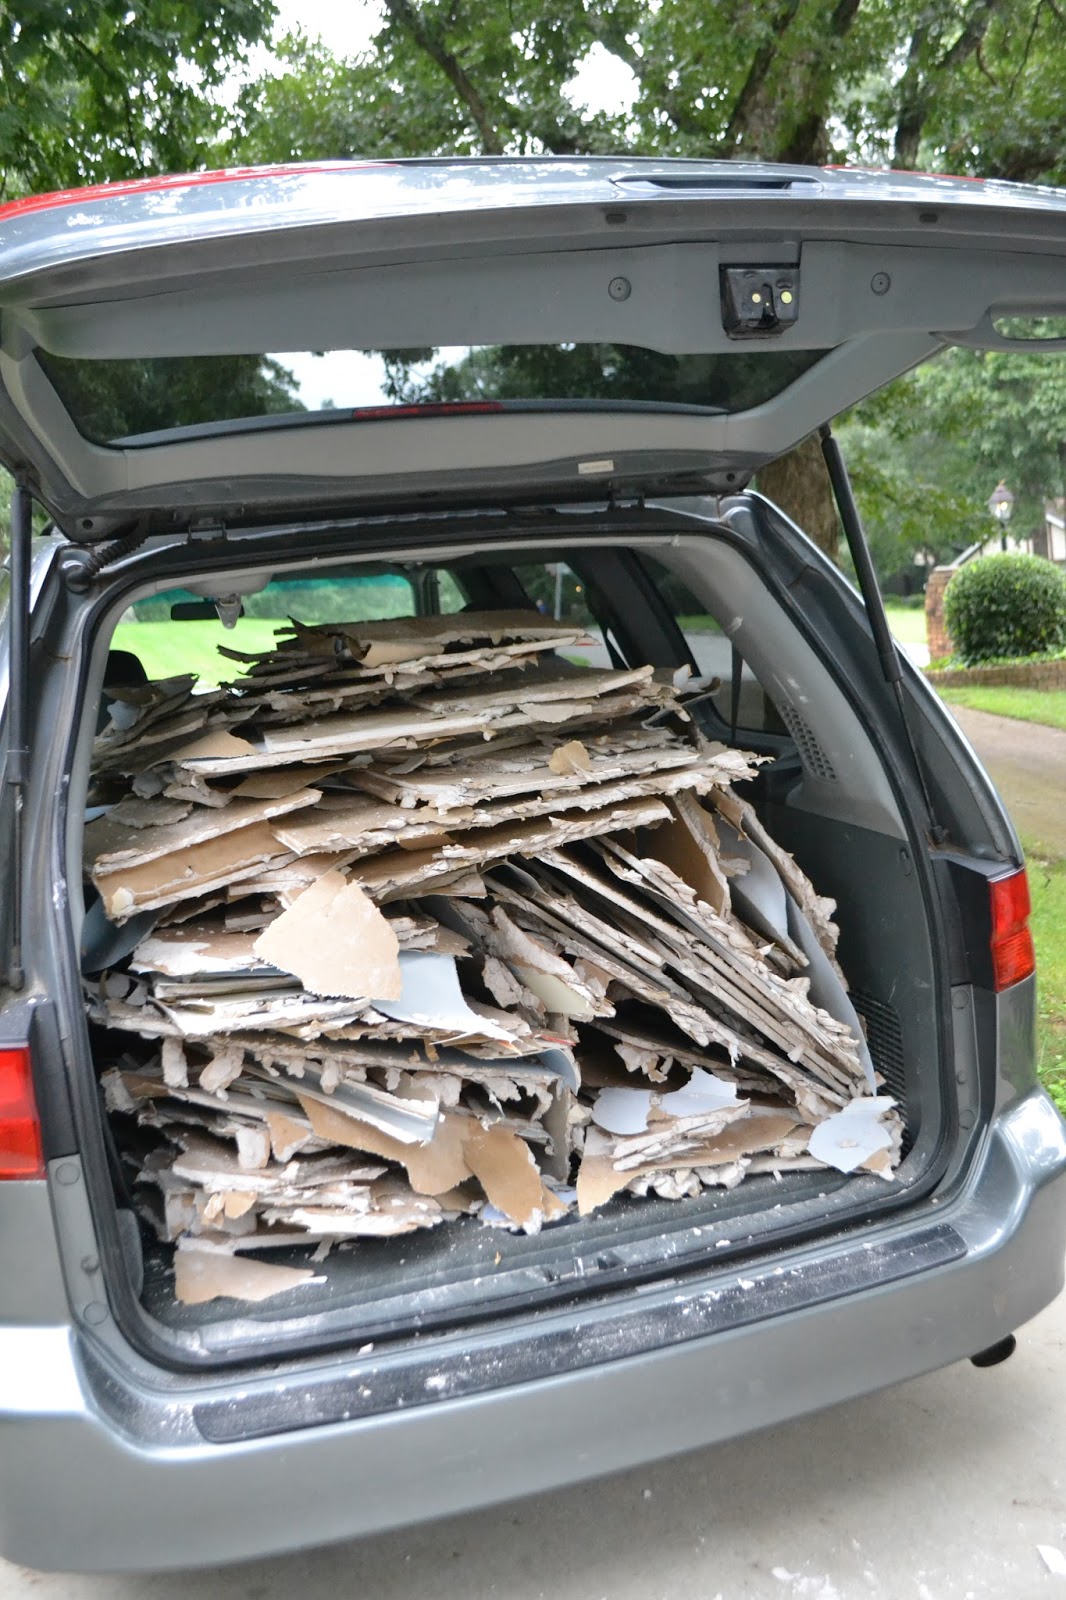
The next step was removing all of the trim. Start by using a razor to cut all of the caulking. If you don't, the paper layer of your drywall will likely peel off when you try to remove the trim.


Next, use a crowbar and hammer to get under a piece of trim. Carefully work your way from one side to the other, pulling the trim away from the wall until it comes completely off. Do this with all the trim pieces until you are left with just the drywall.


Now you need some supplies: 2x4s, drywall, drywall screws, 2.5" or 3" wood screws OR nails, joint compound, sanding block, putty knives (plastic is fine, you can get a pack of three with 6", 8" and 10" included), and drywall tape or mesh (I prefer the mesh).
 
You need to add some framing to be able to attach your drywall. Measure the width of your opening in inches then divide by 16 (because you will be hanging them 16 inches on center). That's how many vertical pieces (studs) you will need. Now measure your height. This is the length your studs will need to be. (Add 1/8" to your length for good measure.) I actually framed out another box as well, but it isn't necessary. You also need to measure the thickness of your drywall as it comes in different sizes. Mine is half inch drywall. I bought a piece that was 4' x 10' because my opening was 43" x 114".

 
You will need nontreated 2x4s for your framing. They actually measure 1.5" x 3.5". If you bring your measurements to the home improvement store, you can get your cuts done there. (Don't forget to add 1/8".)

 
Now mark out your measurements every 16 inches on the top and bottom of the opening. The center of the stud should line up with your marks making them 16 inches on center. They should fit snugly (because you added 1/8", right?). You may have to hammer them into place.


I had a few pieces that were a little short (because I didn't add 1/8"!!!!). No worries because I had a few shims hanging around. NOTE: If this were any kind of load bearing wall, a shim would not be acceptable, but this is basically just a structure to secure the drywall. I hammered the shim in until the stud was snug then inserted my screw diagonally into the horizontal piece of wood above (right where my sister's finger is). You can use nails as well, then it would be called a toenail! Here is a great tutorial on how to toenail wood.

 
Before you add the drywall, mark where your studs are like my sister is doing so you know where you can secure the drywall. Do you know how to cut drywall? It's really easy! You just draw a line where your cut needs to be and score it with your razor. It's easier to have one person on either end if you have a large piece, both firmly holding the drywall under the score then pushing above the score. It should easily "snap" on your scored line. Then take your razor and cut through the paper on the other side.
 
 
Once you cut your drywall to fit, slide that thing into the big whopping hole (in my case) and start securing it with drywall screws. Be sure to countersink the screws and don't get too close to the edge, or your drywall could crumble.
 
Are you still with me? You can do this! It's not hard, right? My demo took about 45 minutes by myself and the construction up until this point with help from my sister took about an hour.


Now comes everybody's least favorite job! Seriously, ask anyone that you know who works in construction or does home improvements. Mudding (spackling) is at the bottom of their list. This is not my strong suit, so I will refer you to this tutorial if you need details. The basics are as follows. Start with your 6" knife and apply joint compound to the seams. Add your tape or mesh (I recommend mesh but I already had the tape). Press down firmly, then apply more joint compound. Let it dry, sand, wipe with a clean slightly damp cloth and start again with the 8" knife. Let it dry, sand, wipe and start again with the 10" knife. Let it dry, sand, wipe...DONE!


Whew! And to be honest, I'm still not done with my final sanding, but my sister convinced me to move the monster entertainment center anyway and start ripping down walls. Of course, I obliged! I will finish it when I get ready to paint. But for now, on to bigger and better things!
 
 
Let's tear out some walls!!! We had another hour to spare and it's WAY more fun!
 
 
Well hello, dining room! Meet your new best friend, living room! More about this soon.
 
Nicole
 

Friday, August 9, 2013

In the Beginning...

As promised, I have lots of fun before pics to share with you. I love this house. It's solid as a rock! The foyer is beautiful, the bedrooms are big. It just needs a little help to reach it's full potential. The previous homeowners made several improvements. I'm just going to take it a step (or ten) further.

 
The kitchen looked big until we moved our table in. The previous homeowner's replaced all of the cabinets and opened it up to the living room a bit. But dark cabinets and beige, beige, beige are not my style. And there is no work surface. We used the island in our old kitchen ALL the time for baking, crafts, homework. I spoke to a local craftsman today and I ordered a HUGE custom farmhouse kitchen island! I can't wait to show it to you!

 
This window is just SCREAMING for built-in seating!

 
See that refrigerator wall? It will soon be gone! Then we will REALLY open things up! Besides, I need a place to put my new island.

 
Okay, so I thought those weird spindle things must have been original to the house, since it was built in the '70s. But when I tore those bad boys out a few days ago, the trim pieces were dated 2006! Hmm...I just don't get it. More to come on this later.

 
Isn't this foyer beautiful? I love all of the natural light that comes in through these windows!

 
This dining room is so lonely and isolated. It will soon be close friends with the kitchen and living room. And look at those '70s floors. You see that grandfather clock in the corner? It is my nemesis! Mr. Skeptic LOVES this thing! I have strict instructions to not get anywhere near it with my paint brush AND I have to work it into the décor somehow. We are going light and bright here, people. Our old dining table bit the dust in the move. I found this one at a furniture liquidation store for $100! What a steal! I will be painting it, of course.


This room, we'll call it the office, is located between the kitchen and dining room. It was originally used as a small dining room and the current dining room was a family room. I call it a big waste of space dumping ground! See that black table? The kitchen is on the other side. That wall will be coming down and this entire room will be part of the kitchen soon! In fact, my sister and I had an hour to spare today and started knocking walls down between this room and the dining room. You would be surprised at what can be accomplished in an hour! More to come on that, too.

So it sounds quite ambitious, right? By the way, when all those walls come down, the flooring has to match. I have 1100 square feet of hardwoods waiting to be installed when it's all said and done. But here's the thing. We have a plan. We are working in stages, maybe an hour or two a day for awhile. It's definitely manageable.  Do you have big plans? Are you too overwhelmed to know where to begin? Take your time and figure out what you can do TODAY. Then do the same thing tomorrow. Break it down into smaller projects and keep the big picture in mind to stay motivated!

Soon I will be walking you through some easy projects that I hope will inspire you to believe that you can do it, too!

Nicole

Tuesday, August 6, 2013

Meet the Crew

Welcome! I'm super excited about starting this adventure. It's going to be a wild ride, so hold on! The kiddos start school in a few short days and then the fun begins. Let me introduce you to the cast of characters...
 

The DIY Addict


Hello, my name is Nicole and I am a DIY addict. I'll try anything once. I'm not crazy, I'm just a visionary (or so I tell myself). I can see how a space can work better and I want to do it...and then I do. I'm also a bargain hunter, so handy AND cheap. It's a good combination.
 

The Skeptic


This is my hubby. We will call him Mr. Skeptic. He is NOT a visionary but he loves me dearly. He works 12 hour days and never knows what he may come home to...heh, heh! He says things like, "I thought we bought this house because it was move-in ready." And I say, "Yeah, but it could be soooo much better!" Then I add, "Hey, you knew what I was like when you married me." He ALWAYS loves my projects when they are done.
 

The Accomplice


My sister is the best. She and her offspring are the reasons we moved to Tennessee. We grew up with a dad and stepdad who could do just about anything, and we were often their assistants. So we both feel like we can do just about anything. We can get into a lot trouble together. Hmmm...I don't remember if I told her about this blog or not. I better fill her in since you will probably be seeing a lot of her.
 

The Demolition Crew


They look angelic, don't they? HA! Don't let their cuteness fool you! Take your eyes off them for five seconds and who knows what they are destroying. And the noise! The noise, noise, noise, NOISE! I think they are the reasons I started using power tools...to drown out the noise.  Our youngest is nicknamed 'The Pterodactyl' to give you an idea. My house was destined to become shabby chic, whether I wanted it that way or not. But I love them desperately and everything I do revolves around them. This awesome picture and our family picture were both taken by Cayce Wagner. If you live in Raleigh, NC, you should give her a call!

The Best Friend


Any reason to throw in a picture of Bailey, the best dog ever, is good enough for me! You will probably see him in a few pictures in the future.
 

...and The Star of the Blog!


Our humble abode. We saw a lot of nice houses and chose this one for the great neighborhood and school district. People say it reminds them of the Brady Bunch house. It's a great house with good bones. When we first put the offer in, a good friend of mine said, "So, what's your first project going to be?" I think I said something like, "I don't think I'll be doing much of anything. It's great just the way it is." Then we moved in, and my wheels started turning...and turning...and turning. Pictures of the interior will be posted soon! If you would like an idea of what I will be doing, check out my Renovation Project folder on Pinterest.
 
And just in case you are wondering what my sister and I were doing in the above pics...this is how it turned out...
 
See you soon!
Nicole